How to Set up your Airsoft Helmet
As you get more serious with airsoft you start to pick up more and more equipment, whether it be gloves, slings, or holsters. However, one thing you'll want to get is an airsoft helmet. While not only looking cool, helmets can serve as a practical function for impacts from BBs or even save you from bumping your head. Not to mention that airsoft helmets can also be a great tool that you can attach things to that you may find useful while playing, for example, night vision goggles or cameras. So, in this blog, we’re going to go over how to set up your airsoft helmet to best suit you. So if that’s something you’re interested in learning about, then read ahead.

4 different types of helmet setups
Choosing Your Airsoft Helmet
Now there are many different types of airsoft helmets that you’re going to have to choose from, the main one you’re probably going to look at is a bump helmet. Bump helmets are non-ballistic helmets that are used Just to keep your head safe, as the name suggests from bumps to your head. Bump helmets offer no ballistic protection, so if you’re planning for your helmet to stop at 7.62 rounds, think again. Ballistic helmets are heavy so if you are planning to get a ballistic helmet keep that in mind. There is a good chance you’re going to wear your helmet all day and your neck will not forgive you after the first few hours.

This is a US soldier wearing a ballistic helmet.
Now most airsoft helmets come in one size but just to be safe double check your helmet doesn’t have select sizing. Most of our helmets on the eHobby website will be one size and can be adjusted to fit your head easily. These helmets can usually be adjusted by a rotary adjustment dial (see photo below) that will adjust the chin straps and the back of the padding to fit your head.

This is the rotary adjustment dial.
The last thing to look for when you’re choosing your helmet is the rail type. Just like on airsoft guns, you have to choose between (for now) two different types of rails. The two types being the maritime rail found on Ops-Core style fast helmets and M-Lok type rails found on the flux style helmets. These two mounting styles are completely different from each other, so you need to consider this when you’re buying your airsoft helmet. You may find that certain attachments won’t fit or you will require an adapter if you choose the wrong type.

This is an example of what a fully built Flux helmet can look like
What to Attach to Your Airsoft Helmet?
Now that you have chosen your airsoft helmet it’s time to add a little personal touch. So the first main thing we would recommend doing is adding a helmet cover. A helmet cover can change the overall color of your helmet, meaning that if you have a black helmet for example, and you want it to be multicam you can easily add a cover and have it be multicam.

A Helmet cover can completely change the look of a helmet.
Now the other thing that can personalize your helmet is patches. Patches are usually the first thing you’ll see on an airsoft player and can strike up a conversation. Whether it’s a team patch, an ID patch, or even just something funny it can add personality to your airsoft helmet. Most helmets allow you to attach patches via Velcro, usually on the left and right side and at the back of the helmet. Again researching the helmet you want to buy will allow you to see if you can attach patches or not, as some helmets may not come with Velcro.
.

This is an influences helmet, if you look closely they have a doll on the back.
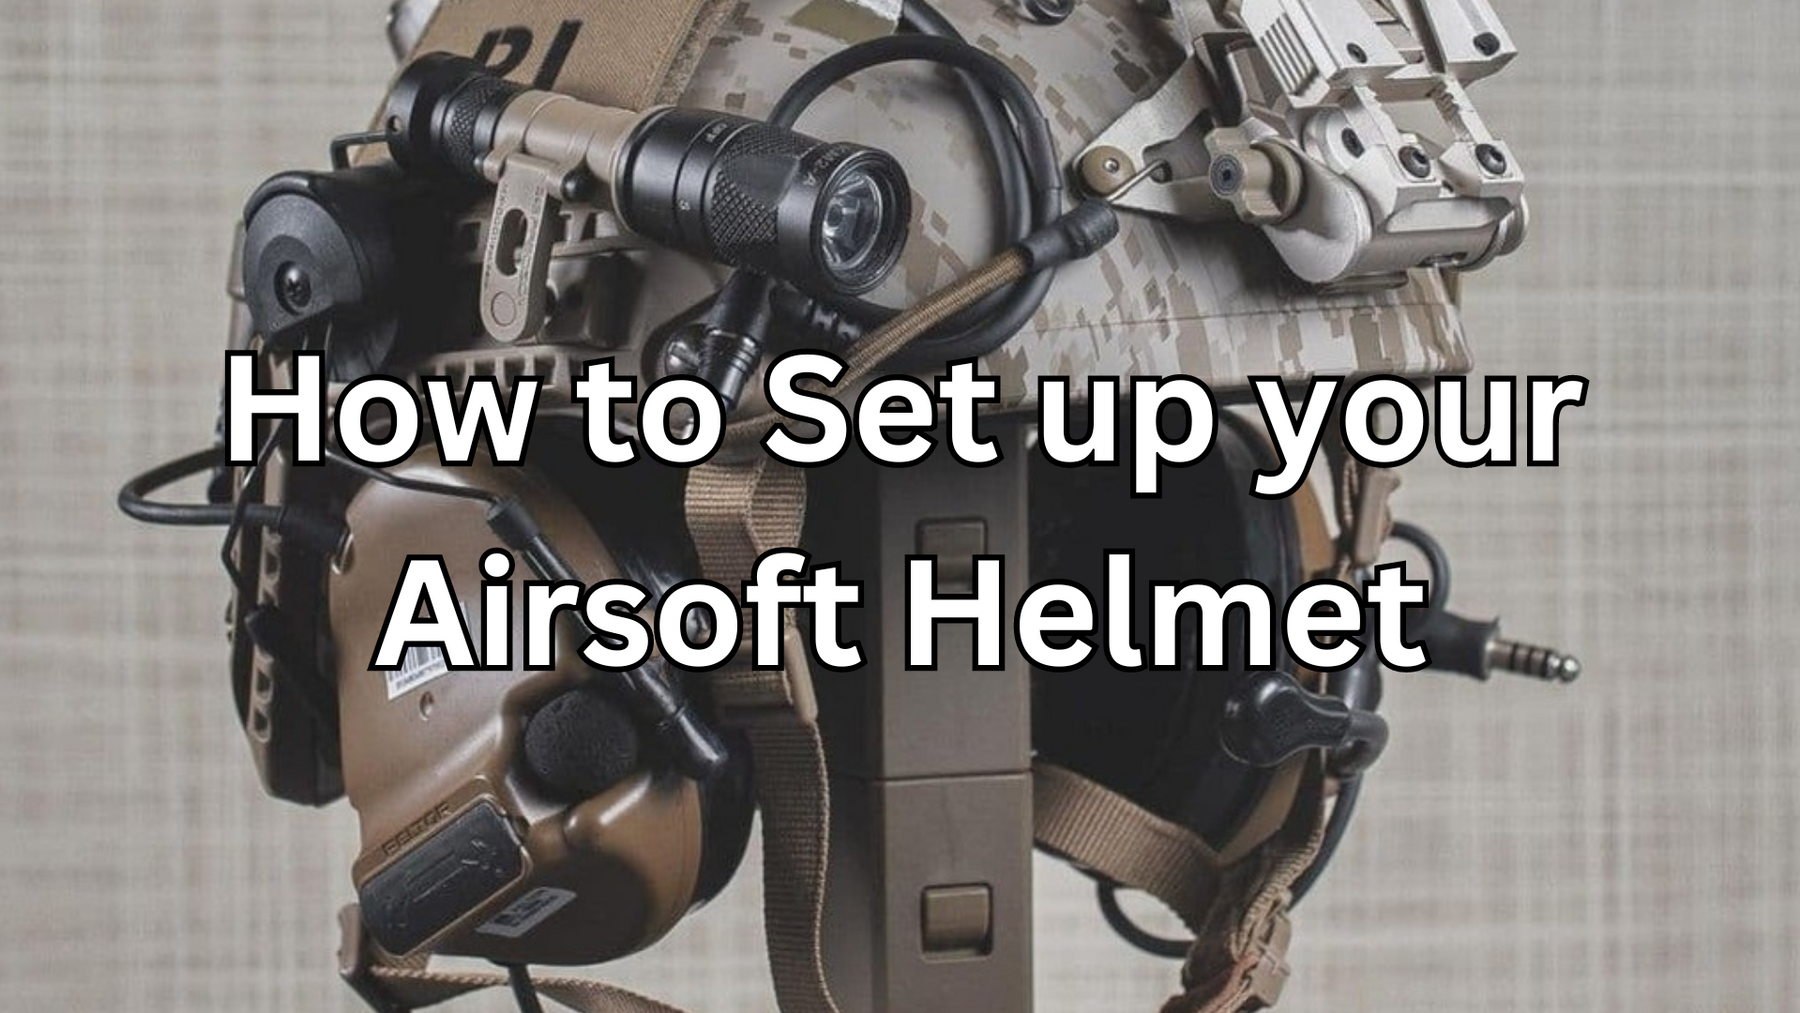
The last main thing to add to your helmet and the one that we think is pretty important is ear protection. Now ear protection is optional, however, depending on your country and the venue you’re at it can help with loud noises. For example, it is great as protection against pyrotechnics. As pyrotechnics can often deafen you if it goes off near you. Hearing protection isn’t just for short-term use; you have to think about it in the long term, if you play often and you are getting subjected to Pyrotechnics at every game it can damage your hearing which you don’t want. If you do not want to wear ear protection but still want to protect your ears you can get side plates or a Mandible for your helmet that will cover your ears, but these offer no protection against sound.
 Ear protection is one of the best things you can invest in for an airsoft helmet
Another big factor for wearing ear protection is that you can connect a radio to it. This is probably one of the main things you’ll want to do if you do plan on having a dedicated helmet setup, as comms can be a game changer. Most ear protection that can be mounted on your airsoft helmet can double as a way to work with your radio. Your ear protection headset will usually have a microphone for you to talk into (depending on the model), as well as a way to connect it to your radio setup, either via a Kenwood adapter or a PTT plug. Some Milsim-type games will require you to use a radio to stay in contact with your team, so having a comms setup is important. Rather than having to take your radio out of your backpack or your pocket, with a helmet set up with comms, you can easily use a PTT (push to talk) and you can speak into the microphone on your headset.

This is a popular YouTuber Called PhoenixFeather with his helmet and comms setup.
How to Mount NVGs to an Airsoft Helmet?
Now we get to the fun part! So, the first main reason you’re probably going to be wearing a helmet is to look cool… but there are many attachments that you can add that will give you a tactical advantage in the game. The first one that many people will get a helmet for is night vision goggles. Night vision goggles or NVGs are a cheat code for airsoft allowing you to see in the dark where others can’t.

This is an example of what you can see through night vision goggles.
The main way to mount your nvgs on your helmet is via the nvg shroud on the front. Now again this is where researching your helmet will come into play. Certain NVGs will take certain types of shrouds for example older type night vision goggles will use different mounts compared to newer ones. However, adapter mounts are an easy fix for this problem if you do end up buying an older type night vision goggle or vice versa. The main mount you’ll be looking at for newer type helmets is the L4G24, This mount allows you to use the dovetail mount for modern nvgs like the PVS14s and PVS31s.

As you can see in this photo the L4G24 mount allows you to mount NVGs
Now that you’ve mounted your NVGs and you’re able to use them, the last step is to get a power source for them. While most NVGs allow you to put a single battery in them and use them handheld or mounted on a helmet, they tend to not last that long. This is where battery packs come into play. Battery packs offer an external power source, allowing you to power your night vision goggles for an extended time. These battery packs also need to be mounted on your helmet and the best place to put that is at the back.

This is what an NVG battery pack looks like
Putting this at the back also counterbalances the weight of your NVGs at the front so your helmet becomes less front-heavy. NVG battery packs are very easy to mount as most of the time they are mounted with an NVG battery pouch via Velcro on the rear of the helmet. All you need to do is put your battery pack in the pouch, run the wire along, plug it into your NVGs, and you're good to go.

As you can see NVG patty pouches not only make your helmet look cool but are practical
Other Things to Add to your Airsoft Helmet
Now let’s go over some extra things that you could consider adding to your helmet. These extras aren’t necessary but they can aid you in some way, whether it be tactically or just for the daily use of your airsoft helmet.
Flashlights:
Adding a flashlight to your airsoft helmet can benefit you greatly. You would usually mount a flashlight to the rail on the side of your helmet, this can allow you to see in the dark without the use of your weapon being up. Mainly this is used when you are not fighting and just looking for something around a room, maybe you dropped your magazine or are looking for an objective in the game.

Cameras:
With cameras you can record your gameplay, allowing you to reflect on the game that you’ve just had. This will allow you to start making videos or to see where you made any mistakes when you’re playing, as well as see if you caught anyone not calling their hits on camera. Cameras can usually be mounted into the shroud on the front of your helmet with a mount.

Goggles:
Mounting goggles to your helmet can be pretty handy. While you already need to wear face protection or eye protection in the game, having an extra pair can be handy and can also look aesthetically pleasing depending on the type of loadout you are doing.

Masks/Gas masks:
Masks and gas masks can be a great addition to your helmet setup. Most helmets allow for some sort of clip-on attachment on their rails, so you can mount masks for face protection on it that you can easily take on and off. Gas masks can also sit flush with the top of your helmet allowing you to cover your whole face as well as your eyes offering both face and eye protection.

Final Remarks
So, that is pretty much everything you will need to know about setting up your Airsoft helmet. Remember to do your research on this subject, as certain parts won’t fit with certain helmets. Also, remember to add your touch or flare to your helmet. Whether that be painting it, mounting something different, or adding specific patches. A helmet is one of the best tools you can have for playing airsoft, it not only protects your head but also gives you an advantage (Especially if you’re running NVGs). But we hope this guide was helpful to you, check out our other blogs on the eHobby website that go over all things airsoft.